

-
×
 Travel Braai
1 × $169.00
Travel Braai
1 × $169.00 -
×
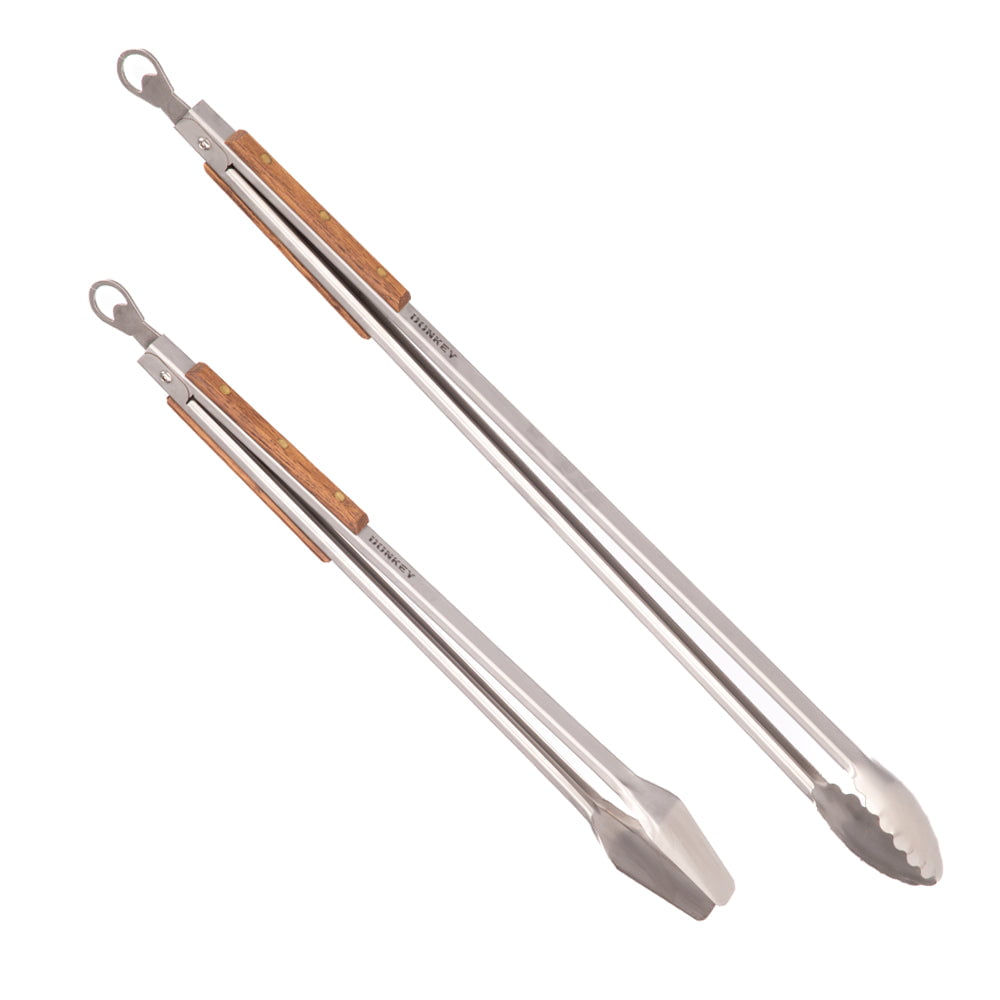 Donkey Combo
- Includes:
Donkey Long Tong × 1
Donkey Tong × 1
1 × $258.00
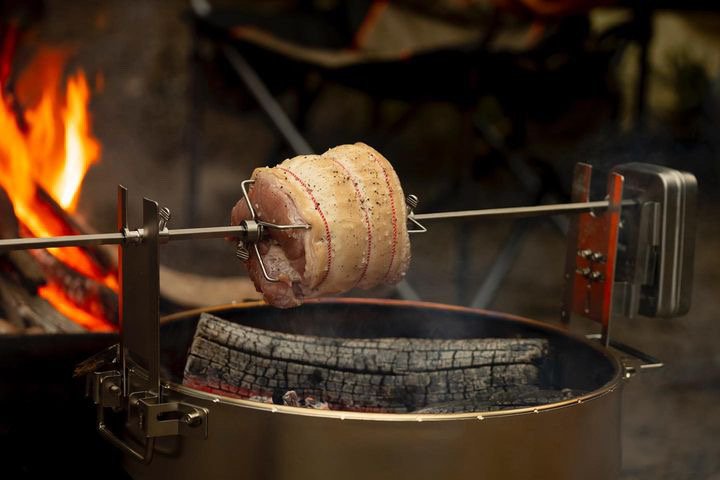
Next Level Cooking
Rotisserie Kit
Congratulations on your purchase of the OZ Braai Stainless Steel Battery-Powered Rotisserie Kit! You’re now one step closer to becoming the ultimate braai master. Designed with both quality and convenience in mind, this kit is the perfect addition to your outdoor cooking arsenal.
At OZ Braai, we’re committed to enhancing your outdoor cooking experience, and this Rotisserie Kit is no exception. Crafted from high-grade stainless steel, it’s not only durable but also incredibly easy to use. Whether you’re a seasoned chef or new to the braai scene, this kit will elevate your culinary game to new heights.
In this instruction manual, you’ll find everything you need to know to assemble, operate, and maintain your new Rotisserie Kit. So, let’s get started and turn your backyard into a gourmet outdoor kitchen!
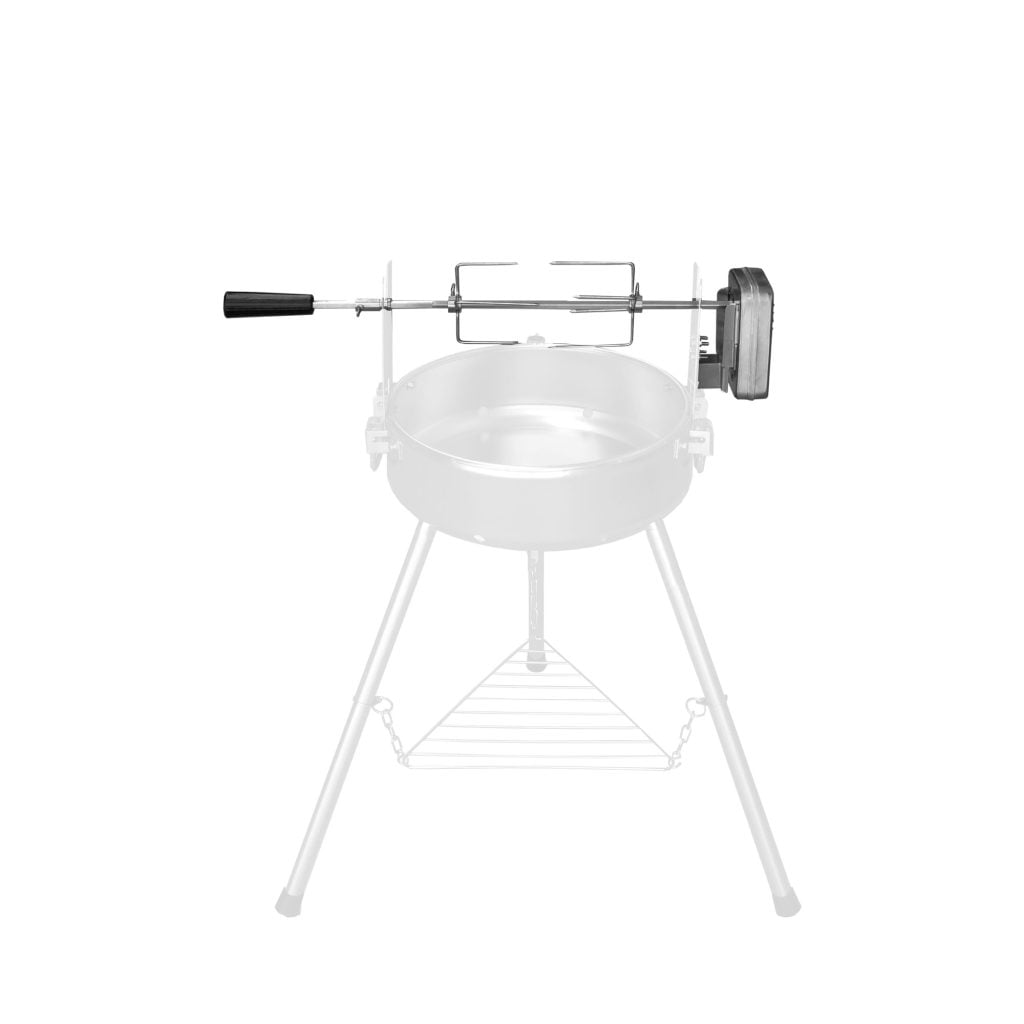
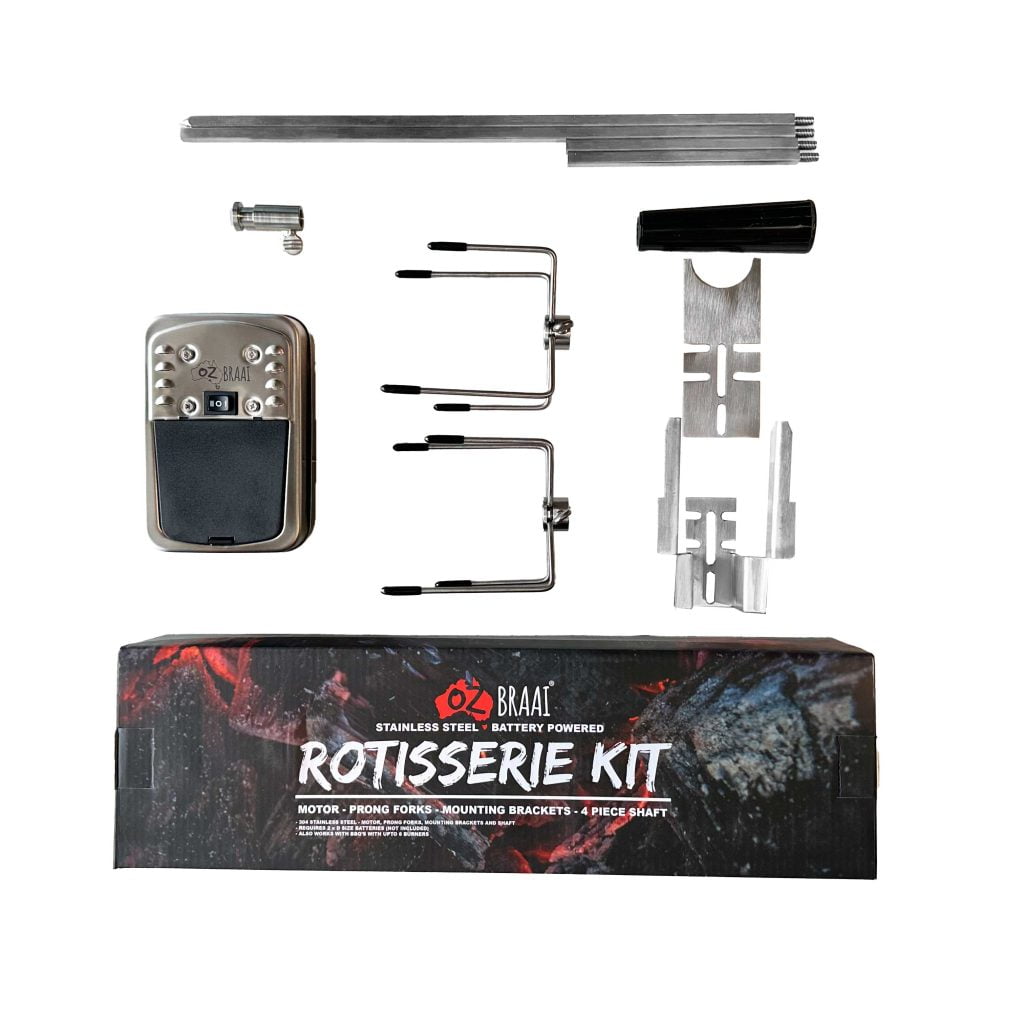
Bits and pieces
What’s Included
- 2 x Mounting Brackets (304ss)
- 4 Piece Shaft (304ss)
- Plastic Handle
- 4 Nuts and Bolts (304ss)
- Bidirectional Motor (304ss)
- Prong Forks (304ss)
- Shaft Ring (304ss)
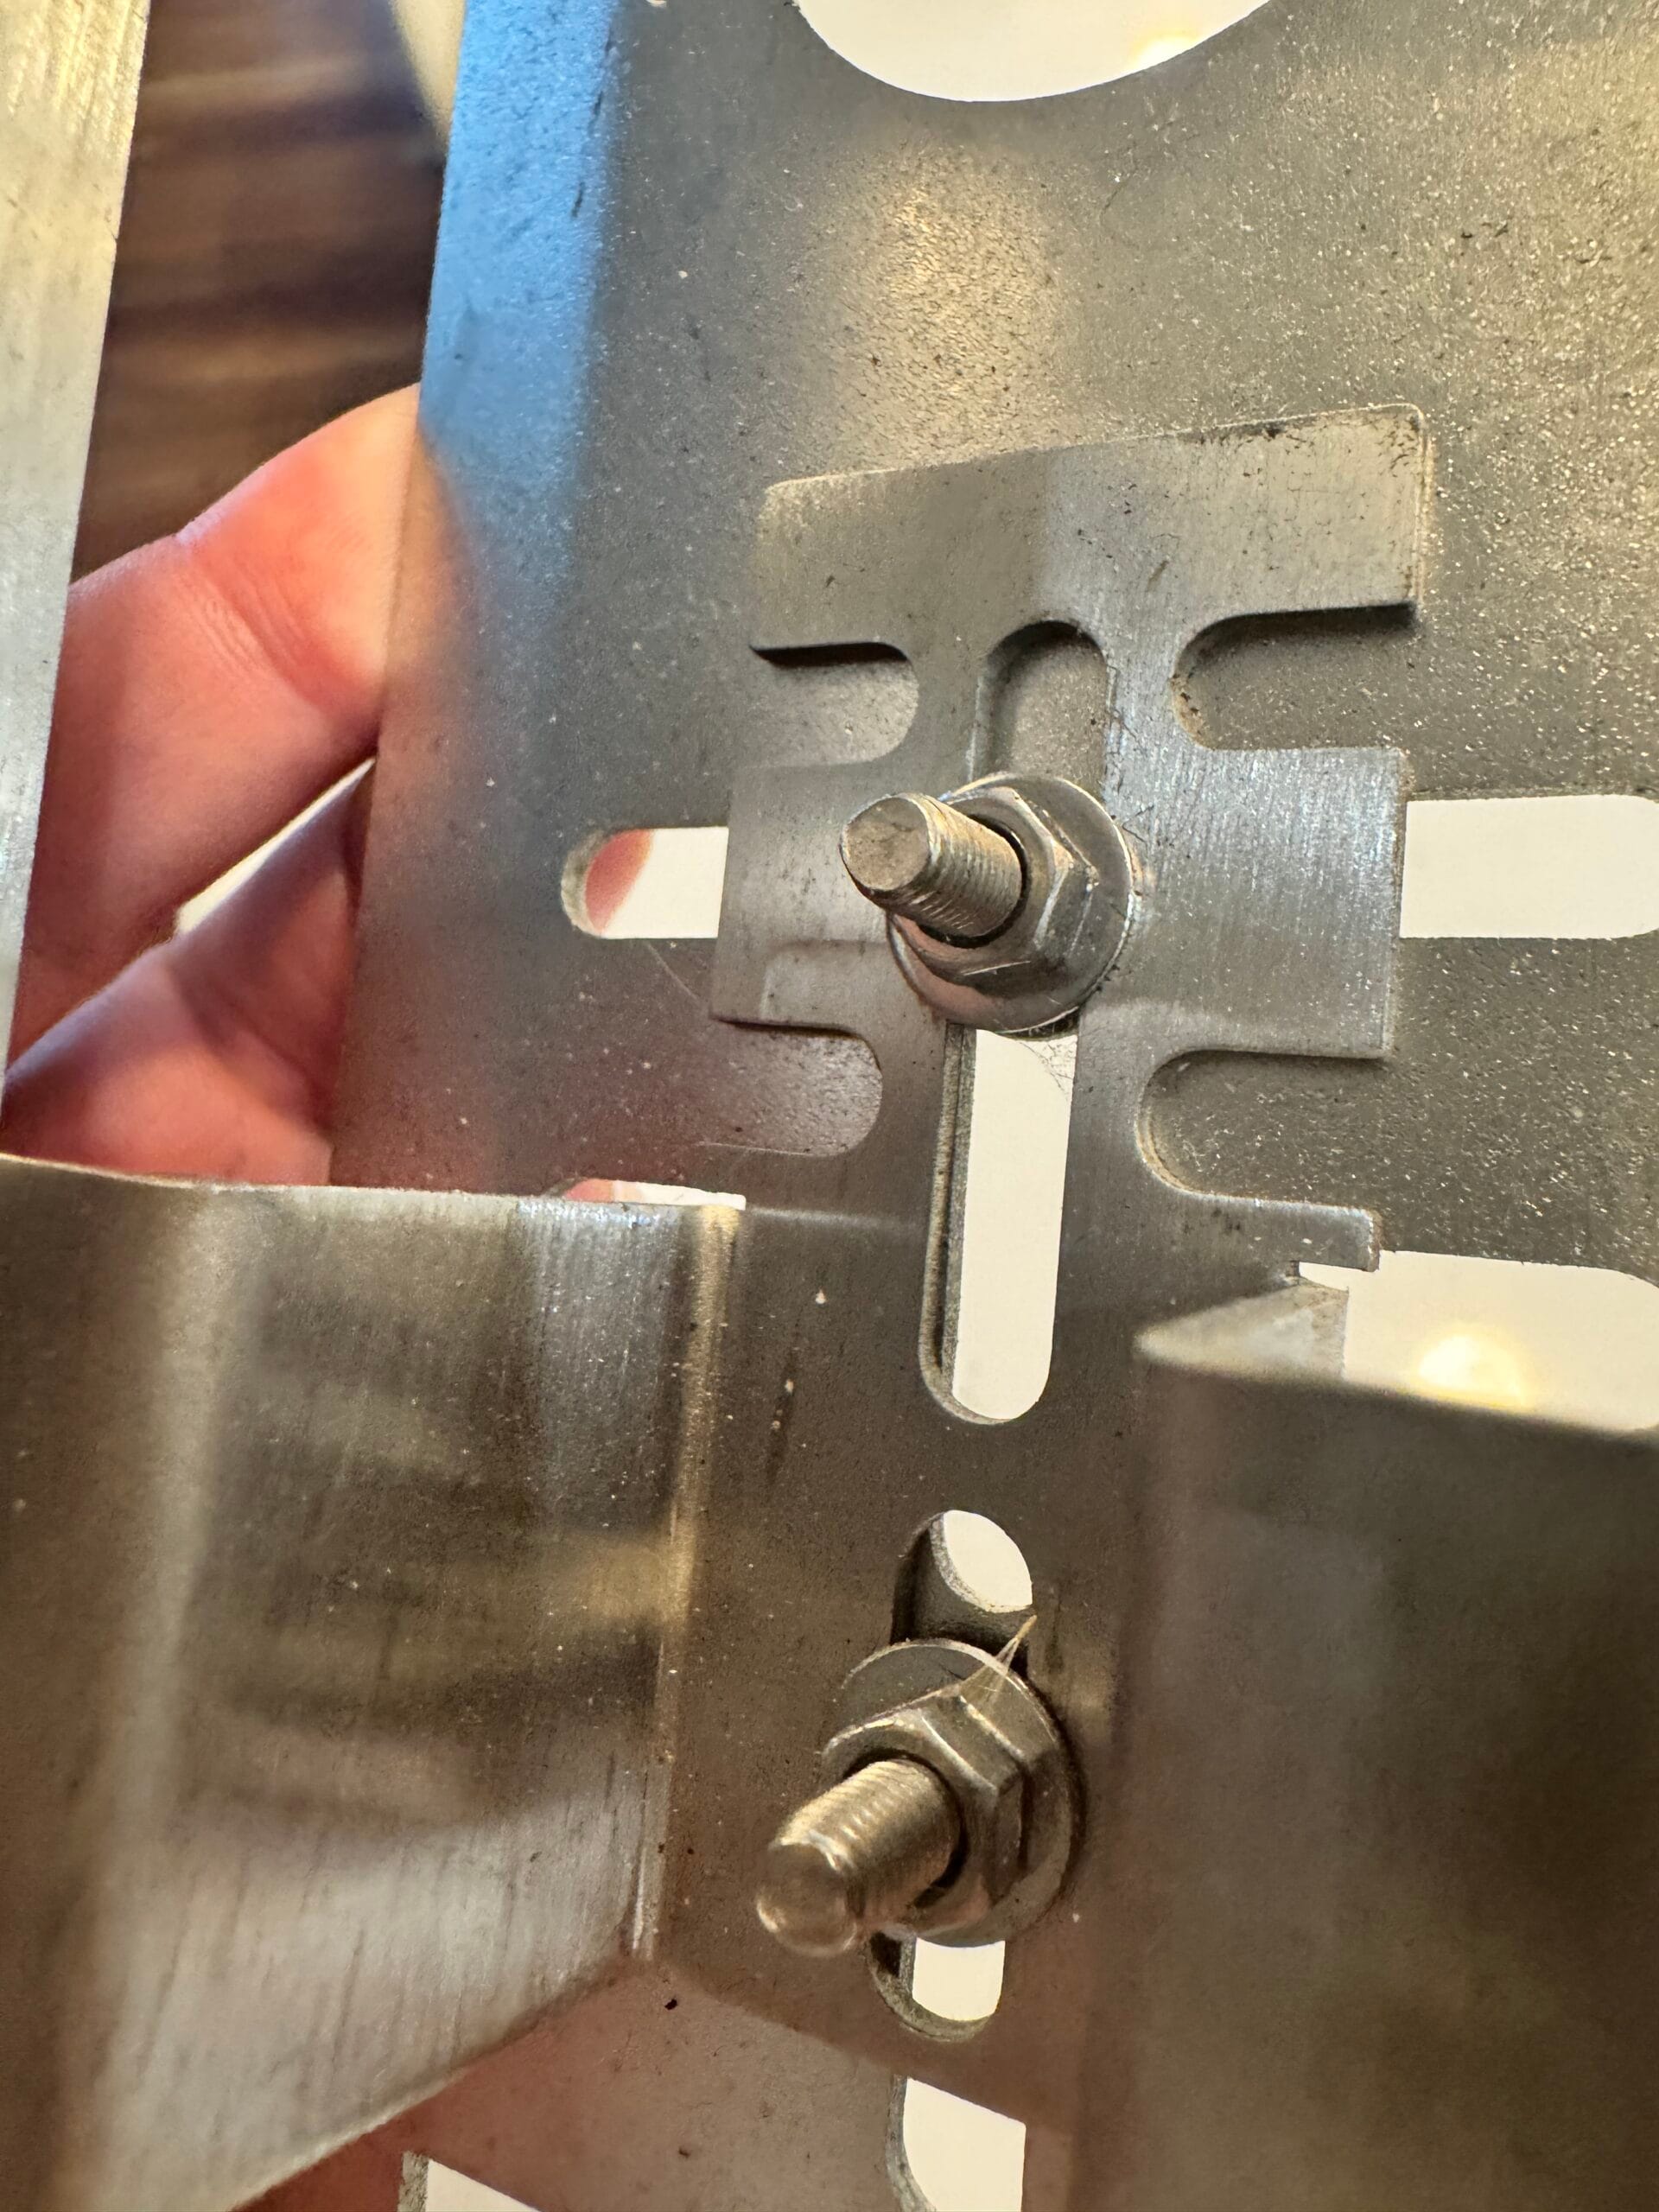
Attaching it to your Compact or Mini Braai Brackets.
Attaching Brackets with Nuts and Bolts
- Identify Components: You only need two nuts and bolts to attach the motor bracket to your Compact or Mini Braai Bracket.
- Use the middle slots so that you can move the motor bracket a bit up so that the rod does not touch your Compact or Mini Braai Bracket when in use.
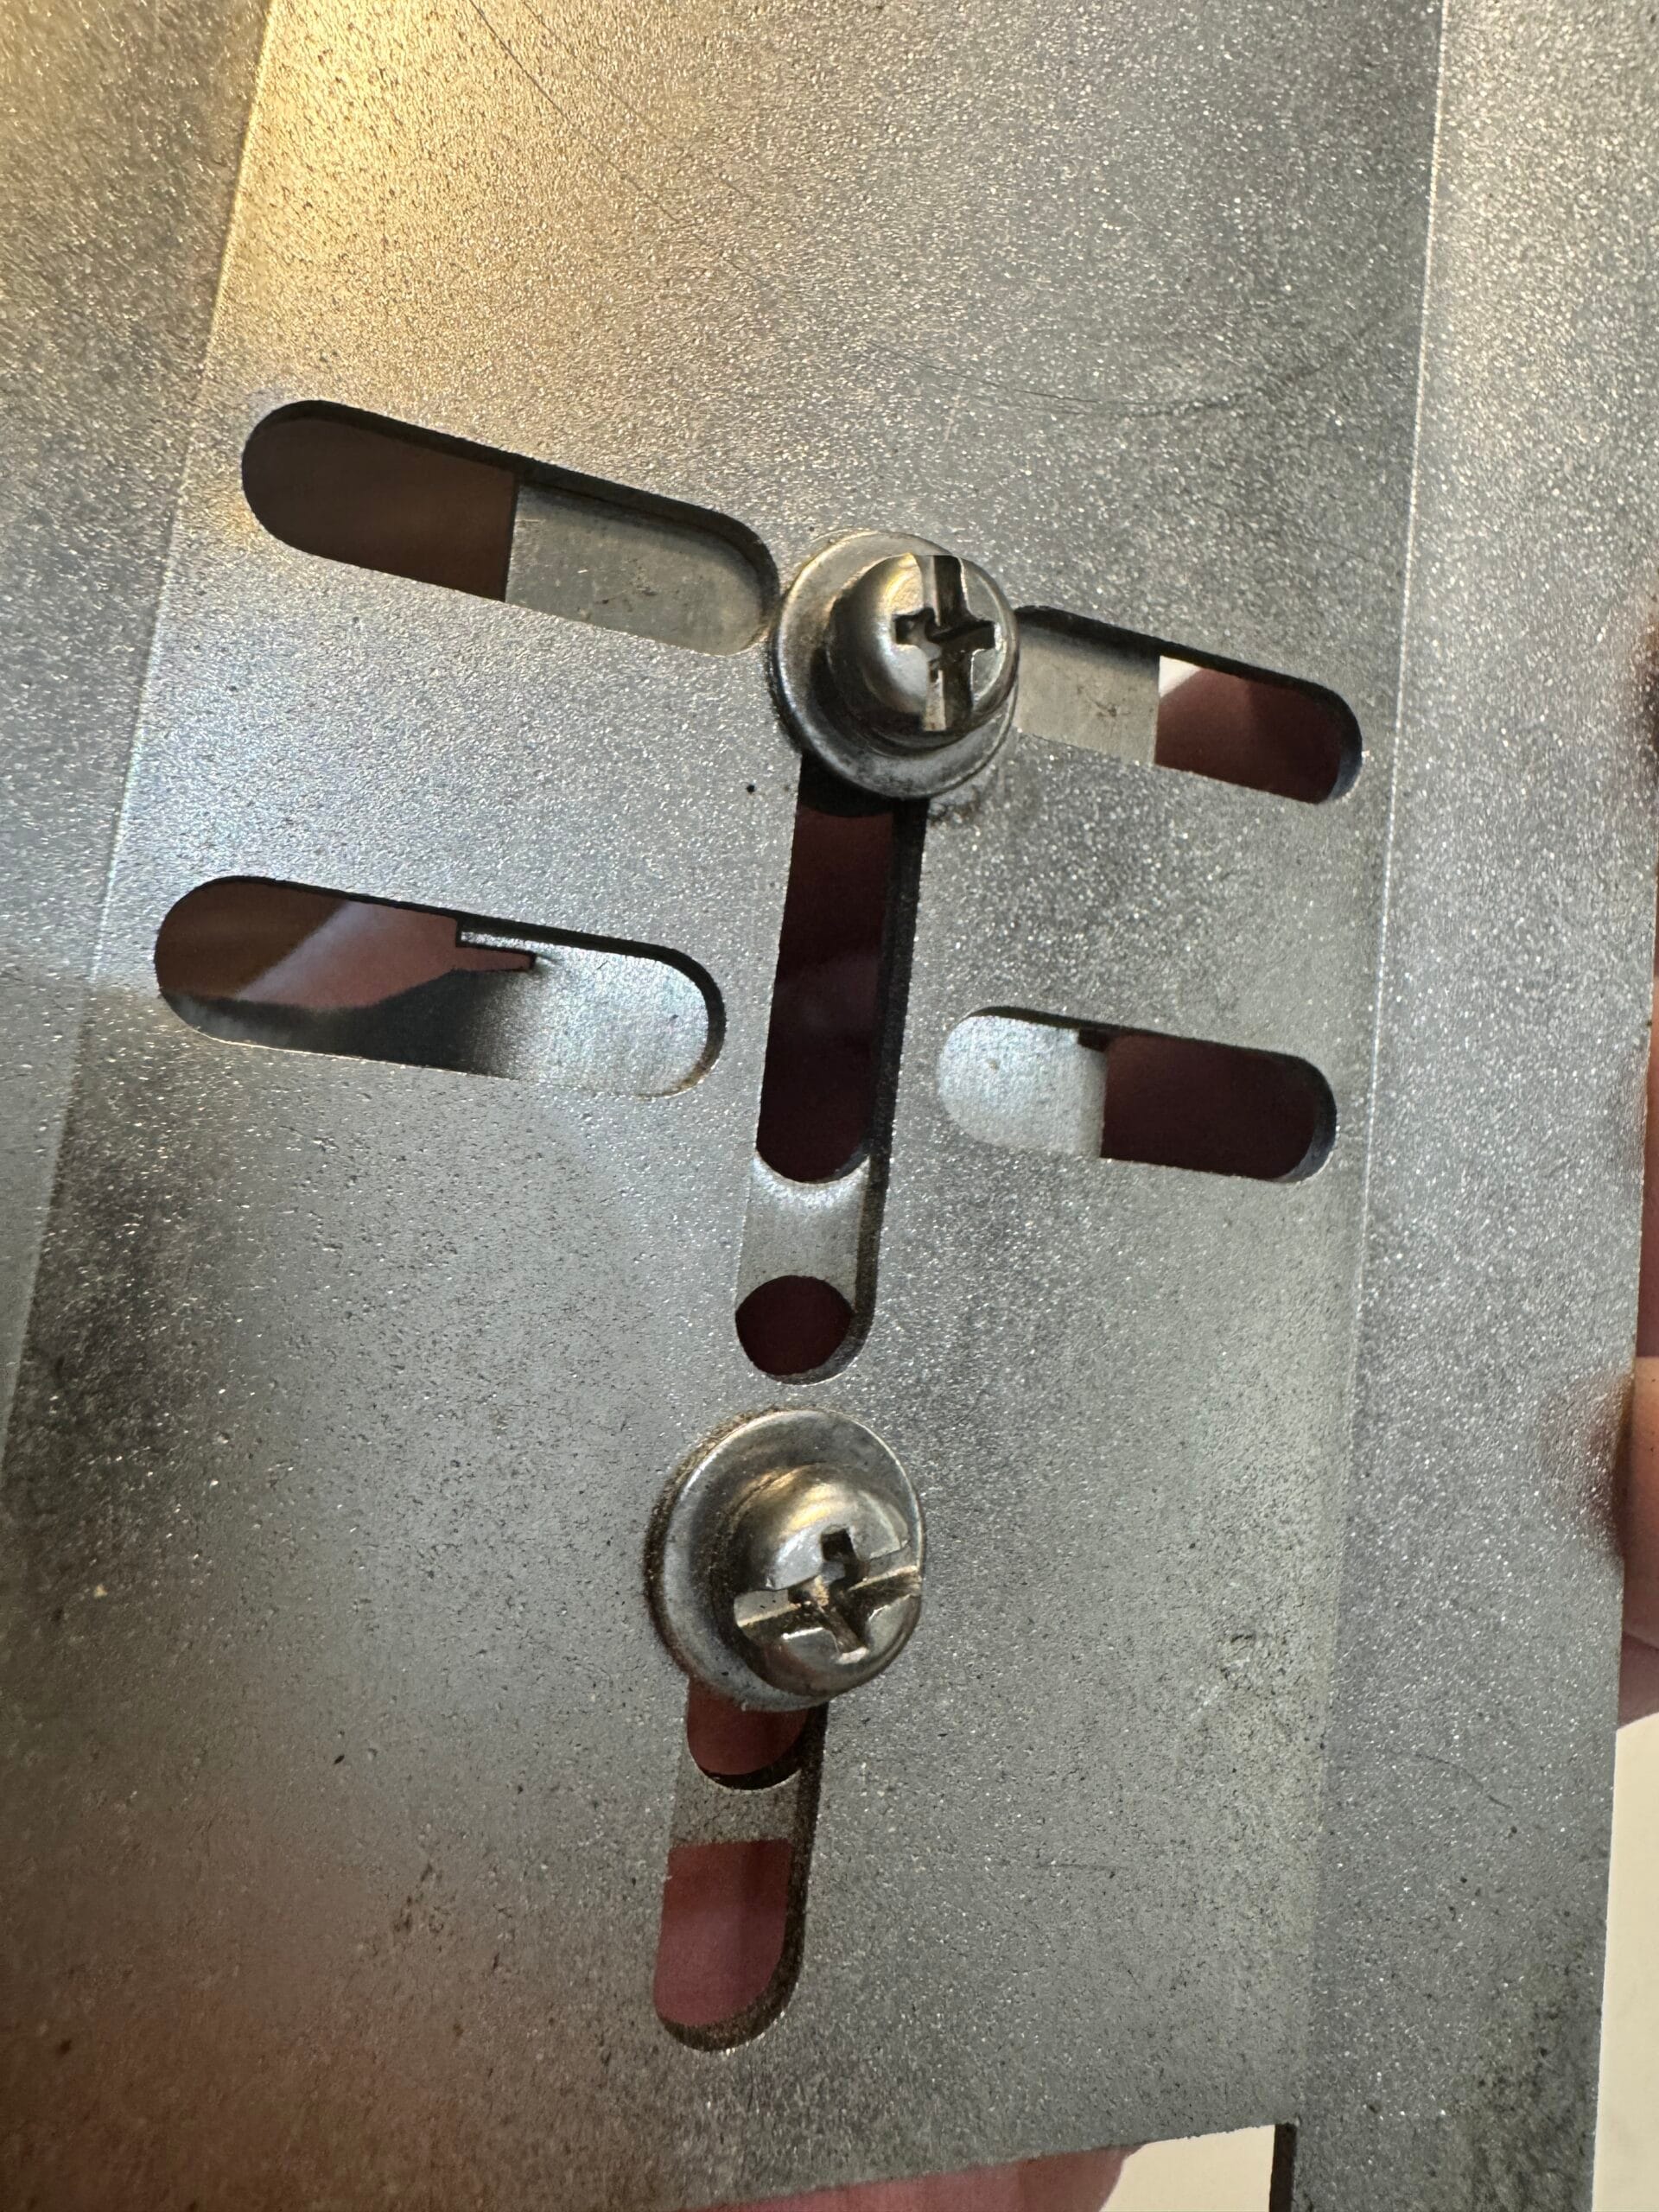

For BBQ’s or Braai’s not from OZ Braai
Attaching Brackets with Nuts and Bolts
- Identify Components: Make sure you have all the brackets, nuts, and bolts that came with your kit.
- Position the Brackets: Place the brackets against the surface where they will be attached. If the Braai or BBQ does not have existing holes to cater for a rotisserie bracket you will need to drill some holes.
- Mark Holes: Use a pencil to mark the holes where the bolts will go through. We recommend using the middle slots which will allow you to adjust the height easily after drilling the holes.
- Drill Holes: If attaching to a surface that requires it, drill holes using a drill bit slightly bigger than the M5 bolts.
- Insert Bolts and Attach the Nuts: You need 2 bolts per bracket.
- Using Brackets with Compact Braai 2.0 or Mini Braai rotisserie brackets: When using the rotisserie kit with our Compact Braai v2.0 or Mini Braai you only need to attach the main motor bracket to the bracket that came with the Compact or Mini Braai. We also recommend to use the middle slots so that you can adjust the height of the bracket to suite your configuration.
- Secure: Use a wrench and a screwdriver to fully secure the nuts and bolts.
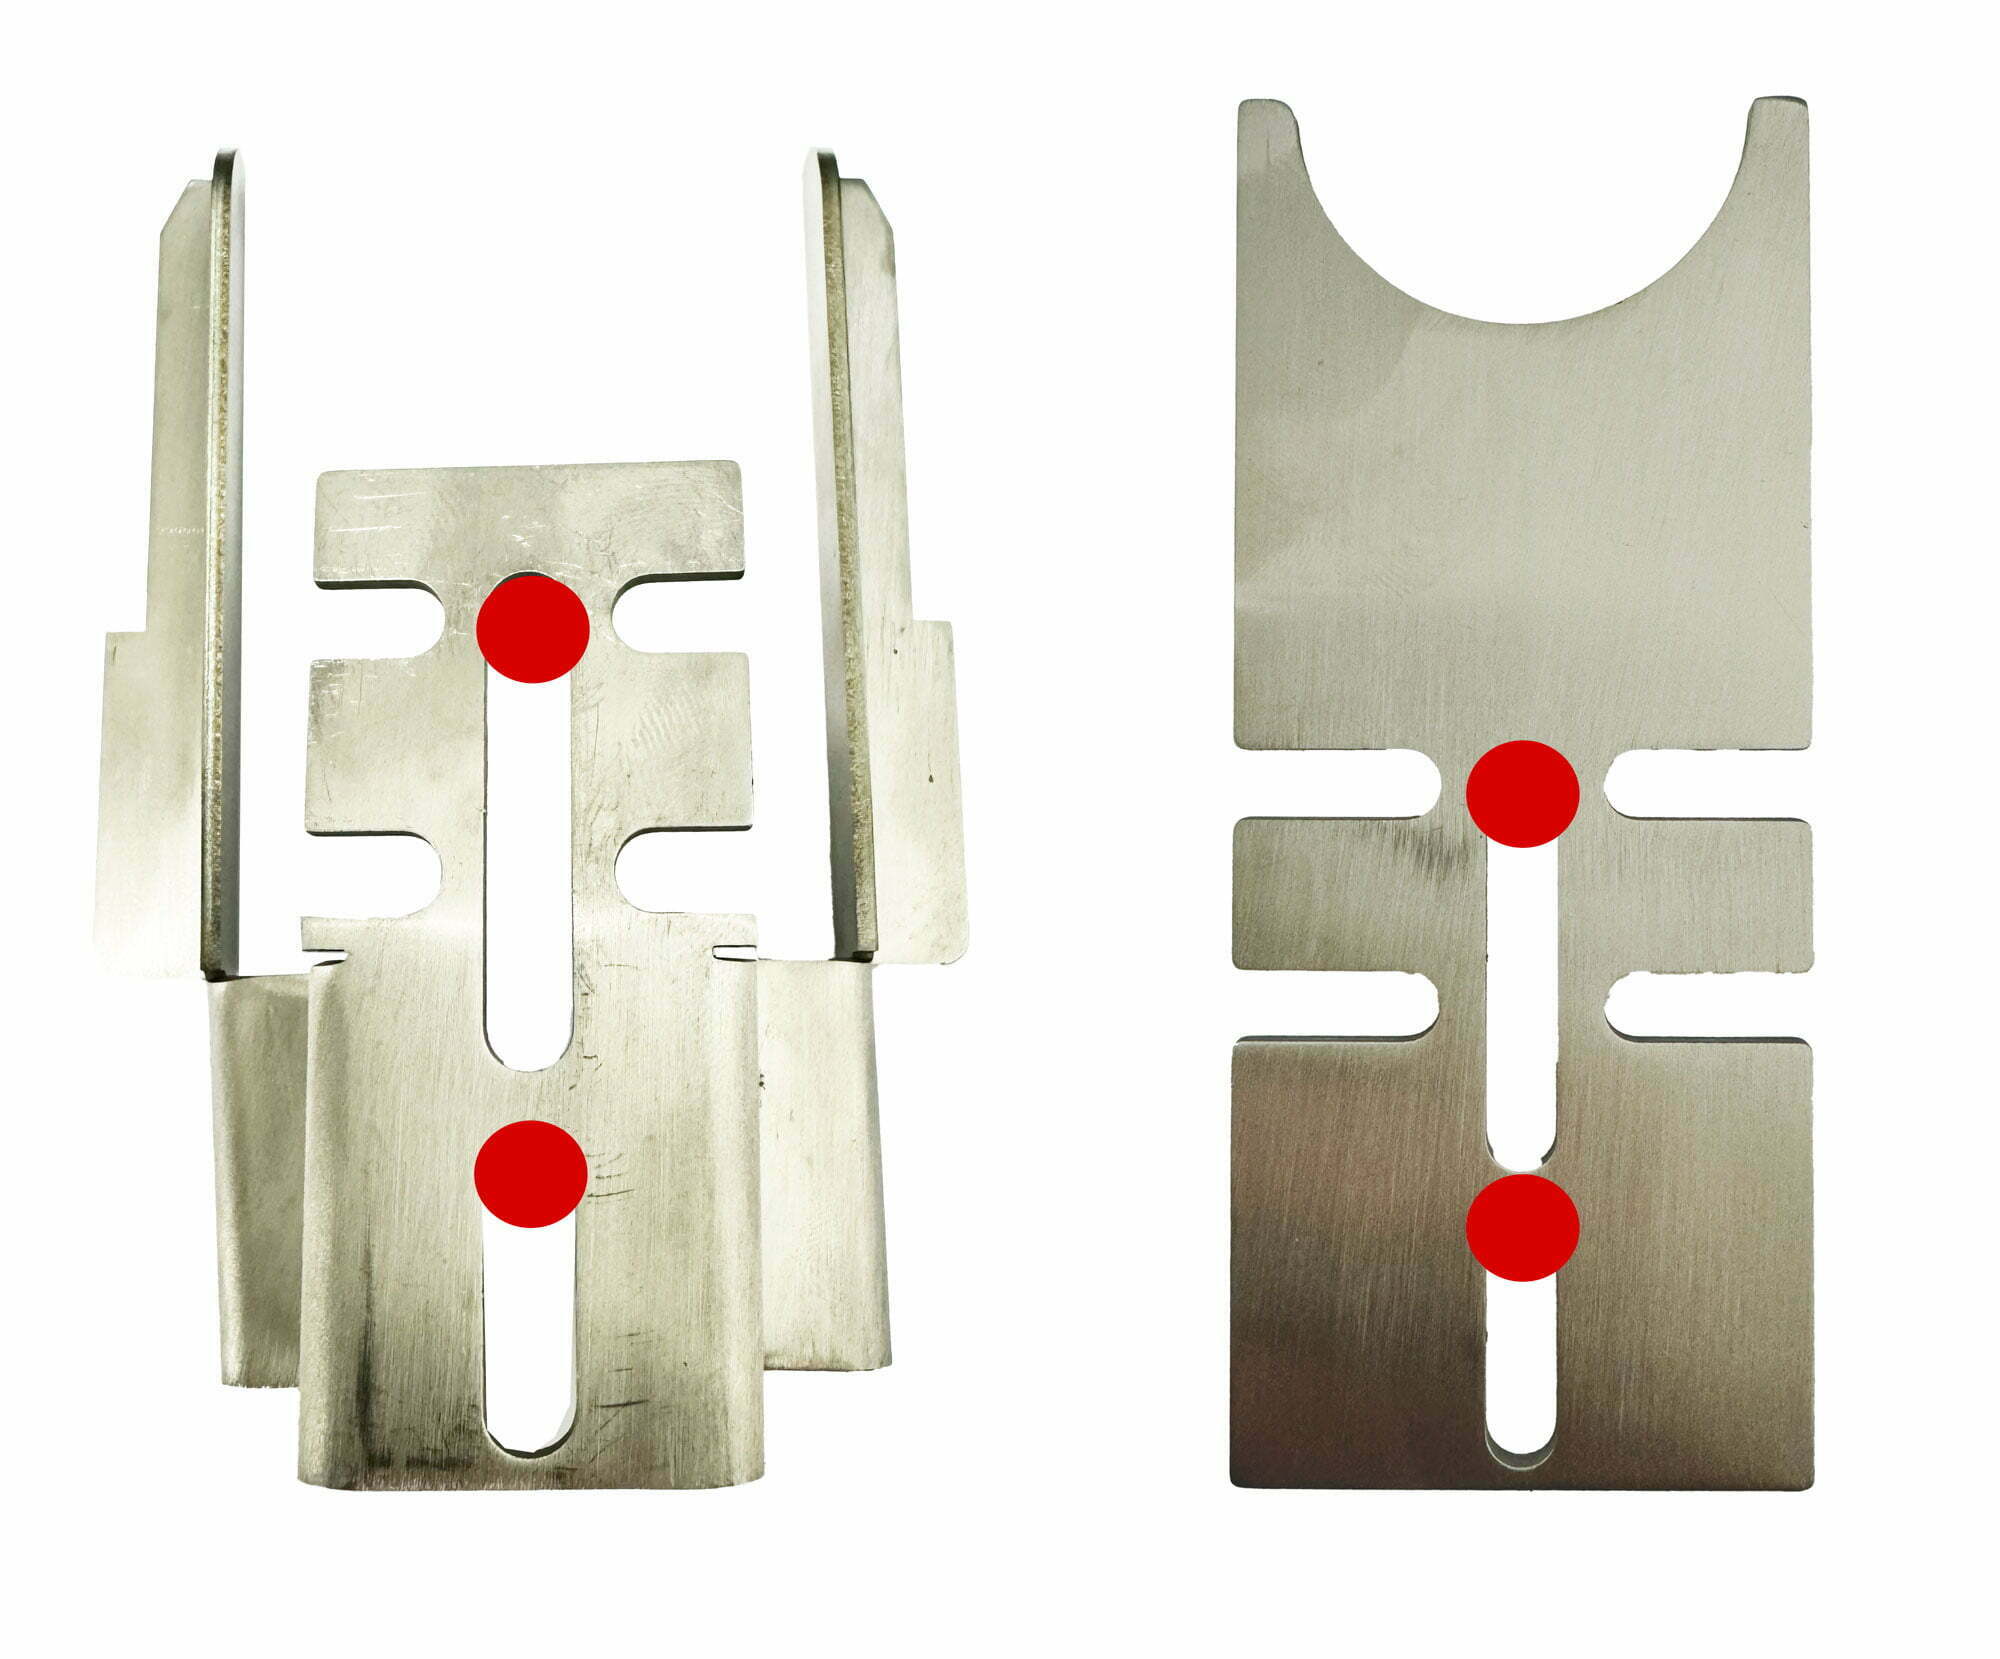
Adjusting the Height
- Loosen Nuts: Slightly loosen the nuts on the brackets.
- Adjust Height: Slide the brackets to your desired height.
- Tighten Nuts: Once the brackets are at the desired height, tighten the nuts to secure them in place.
Configuring the 4 Shafts
- Identify Shafts: Make sure you have all 4 shafts that came with your kit.
- Select Configuration: Choose the configuration that suits your braai model.
- Shaft Thread: The thread on the shaft is anti-clockwise to fasten and clockwise to loosen.
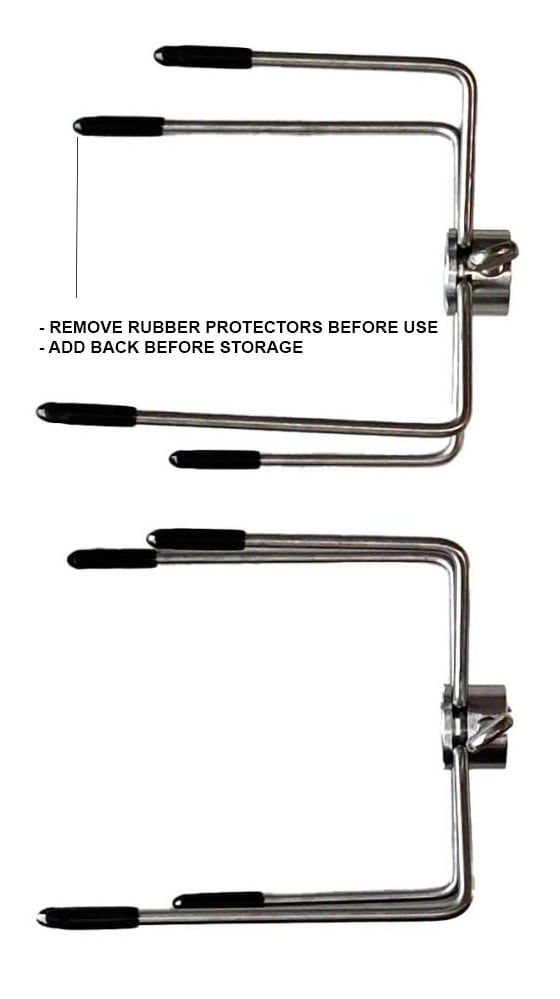
Prongs
- Rubber Protectors: Remove the reusable rubber protectors before use.
Motor
- Motor Batteries: The motor uses 2 x D batteries.
- Motor Direction: The motor has 2 settings. I and II: when the motor is used with the shaft that was included you should use setting II as this will ensure the shaft does not unscrew during operation.